반응형
난위도 : 🧦🥼🧥👔🧶
앞으로 남은 프로젝트동안
큰 도움이 되길 기원하며
작성함
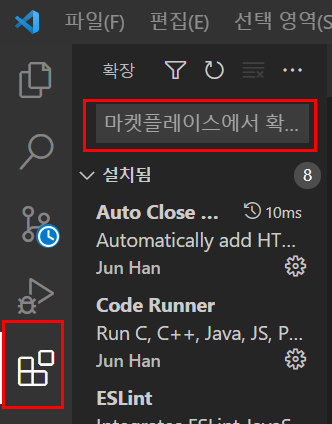
✔️ VScode 확장(마켓플레이스) 설치해야되는 파일🧨🎇
- Auto Close Tag
- Code Runner
- ESLint
- Korean Language Pack for Visual Studio Code
- Live Server
- Material Icon Theme
- open in browser
- Prettier - Code formatter
# 크롬 Tool 다운받기
- Visual Inspector
- React Developer Tool
🎈# 프론트 엔드 초기세팅 가이드~!🎇✨🎏🎗🎟
✔️CRA 설치 ~!! 프론트엔드의 꽃
// 원하는 directory 이동 후 CRA 프로젝트를 설치 해주세요.
// ex. cd Desktop/wecode > npx create-react-app webucks-project

npx create-react-app webucks-project
✔️ React Router 설치 경로 기반~!
npm install react-router-dom --save
✔️ Sass 설치
npm install node-sass --save
✔️ .eslintcache 파일
{ "extends": ["react-app", "plugin:prettier/recommended"] }
✔️ .gitignore파일
* 참고 URL : https://www.toptal.com/developers/gitignore
# See https://help.github.com/articles/ignoring-files/ for more about ignoring files.

# dependencies
/node_modules
/.pnp
.pnp.js

# testing
/coverage

# production
/build

# misc
.DS_Store
.env.local
.env.development.local
.env.test.local
.env.production.local

npm-debug.log*
yarn-debug.log*
yarn-error.log*

.eslintcache
✔️ .prettierrc파일
{
  "tabWidth": 2,
  "endOfLine": "lf",
  "arrowParens": "avoid",
  "singleQuote": true
}
✔️ .package.json파일
{
  "name": "westabucks-react-team2",
  "version": "0.1.0",
  "private": true,
  "dependencies": {
    "@fortawesome/fontawesome-svg-core": "^1.2.36",
    "@fortawesome/free-regular-svg-icons": "^5.15.4",
    "@fortawesome/free-solid-svg-icons": "^5.15.4",
    "@fortawesome/react-fontawesome": "^0.1.15",
    "@testing-library/jest-dom": "^5.14.1",
    "@testing-library/react": "^11.2.7",
    "@testing-library/user-event": "^12.8.3",
    "cros": "^1.0.1",
    "node-sass": "^6.0.1",
    "react": "^17.0.2",
    "react-dom": "^17.0.2",
    "react-router-dom": "^5.2.1",
    "react-scripts": "4.0.3",
    "web-vitals": "^1.1.2"
  },
  "scripts": {
    "start": "react-scripts start",
    "build": "react-scripts build",
    "test": "react-scripts test",
    "eject": "react-scripts eject"
  },
  "eslintConfig": {
    "extends": [
      "react-app",
      "react-app/jest"
    ]
  },
  "browserslist": {
    "production": [
      ">0.2%",
      "not dead",
      "not op_mini all"
    ],
    "development": [
      "last 1 chrome version",
      "last 1 firefox version",
      "last 1 safari version"
    ]
  },
  "proxy": "http://52.79.143.176:8000",
  "devDependencies": {
    "eslint-config-prettier": "^8.3.0",
    "eslint-plugin-prettier": "^4.0.0",
    "prettier": "^2.3.2"
  }
}
✔️ .settings.json파일
{
  "editor.defaultFormatter": "esbenp.prettier-vscode",
  "editor.tabSize": 2,
  "editor.formatOnSave": true,
  "editor.codeActionsOnSave": {
    "source.fixAll.eslint": true
  },
  "javascript.format.enable": false,
  "eslint.alwaysShowStatus": true,
  "files.autoSave": "onFocusChange"
}
🎈# 빽엔드 초기세팅 가이드~!🎇✨🎏🎗🎟
✔️ NPM 초기화
npm init -y
✔️ 서버 작동 확인
const http = require('http') // 1

const server = http.createServer((req, res) => { // 2
  console.log('request received')

  res.setHeader('Content-Type', 'application/json') // 3
  res.end(JSON.stringify({ message: "Welcome to >wecode server! Http server without express" })) // 4
});

server.listen(8080, () => {
  console.log('server is running on PORT 8000')
}) // 5
node withoutExpress.js✔️ httpie 설치
# httpie 라는 터미널 전용 http client 프로그램이 설치되어있어야 합니다.
# 각각의 환경에 맞게 아래 명령어를 통해서 httpie 를 설치하세요.
# mac 환경
brew install httpie
# ubuntu 환경
apt-get install httpie
# or
sudo apt-get install httpie

# 성공적으로 설치가 끝난후 아래 명령어를 터미널 창에서 입력 해 보세요.
http localhost:3000
✔️ express 설치하기
npm install express --save
✔️ babel 설치
npm install --save-dev @babel/core @babel/preset-env @babel/node✔️ nodemon 설치
npm install --save-dev nodemon

npm install -g nodemon
✔️ Prisma 설치 세팅
npm install prisma --save-dev
npm install @prisma/client --save


npx prisma init // prisma 초기 세팅
//prisma/schema.prisma 파일 세팅
datasource db {
provider = "mysql"
url = env("DATABASE_URL")
}//.env 파일 세팅
DATABASE_URL = "mysql://USERNAME:PASSWORD@localhost:3306/DATABASE_NAME"
✔️ Migration 설치 세팅
npx prisma migrate dev --name init
✔️Bcrypt 암호화
npm install bcryptjs --save-dev
✔️JWT 발행
npm install jsonwebtoken --save-dev반응형